|
|
Post by woahblackbetty on Jun 24, 2012 20:49:41 GMT -6
I dove back into things today;
First off, I pulled an idiot move yesterday and hadn't torqued the spark plug down when I was done. I believe that's what caused the issues yesterday.
Got her running this morning (first kick) and she idles great, free-revs easily but has absolutely NO power at all.
It won't start at all with the choke pulled, if I start it and have it idling, pulling the choke kills it instantly and the air screw is out just over 2 turns. I'm thinking that it's jetted too rich. Dropped back one size on the pilot (now running a 27, I had a 30 in there)
I need to get a new carb insulator as the original one disintegrated. Given that I'm now running a Mikuni style rather than the Keihin I was planning on getting one from BikeBandit. Right now the carb is mounted on a short piece of clear heavy vinyl hose but that doesn't have the strength to hold up to the heat as well as I obviously need.
If anyone reading cares to chime in at any time I'd appreciate some ideas.
|
|
|
|
Post by brad on Jun 25, 2012 9:03:58 GMT -6
Sounds like you're on the path to 2T enlightenment.
|
|
|
|
Post by woahblackbetty on Jun 25, 2012 12:31:02 GMT -6
Sounds like you're on the path to 2T enlightenment. Lord I'm hoping so!! I worked up the layout of my current carb mount setup vs the Mikuni M-VM28-200  Looks like I'll need to file a little on the holes of that to get the screws to fit. Less than 1mm each side though. Is there anywhere here in town that may stock these things? I'd rather not have to wait on shipping from an online vendor. Also going to fab a support for the rear of the carb so I can run a Unisock or pod filter of some type. Factory airbox isn't in the greatest condition at all & the hose to connect to that is shot too. I mocked up the approximate location of the carb once the Mikuni flange adapter is installed and built a small shelf to support the back of the carburetor. I've got a UniFilter 1.75"x4" single stage filter on it's way. The shelf attaches to the cross tube which holds the upper rear engine mounts. It's made out of an old mount for radios in cop cars. Planning on using the holes in it to run a hose clamp or zip ties through to secure the back end of the carb when it's all said and done. Side view: 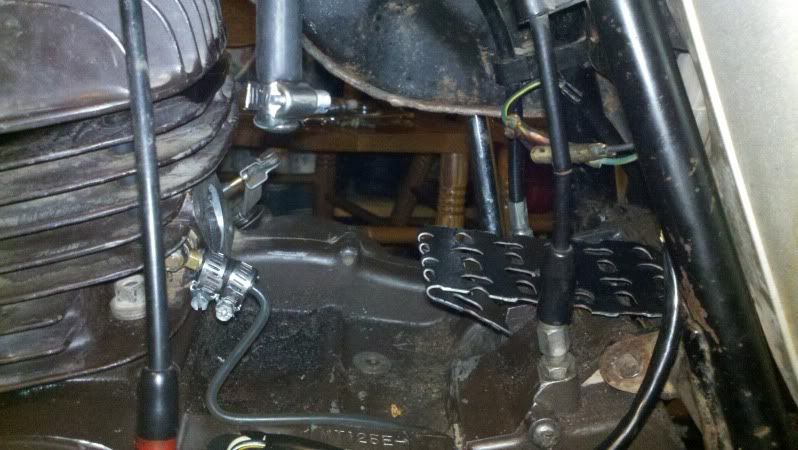 Front 3/4 view 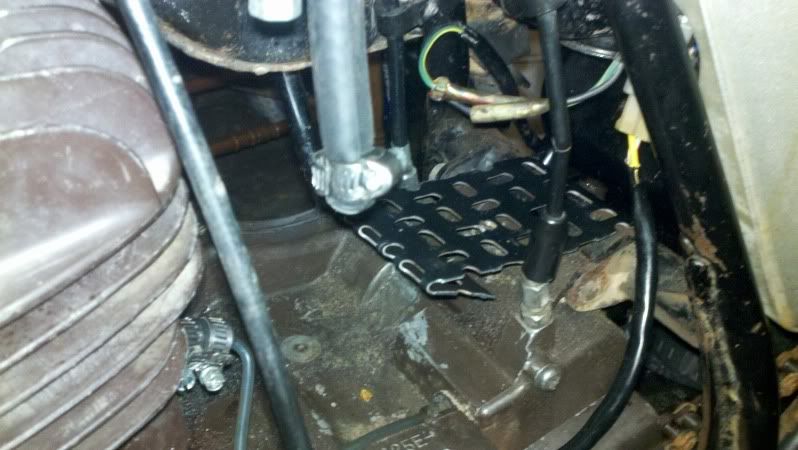 Rear view showing the mounting screws in relation to the oil reservoir 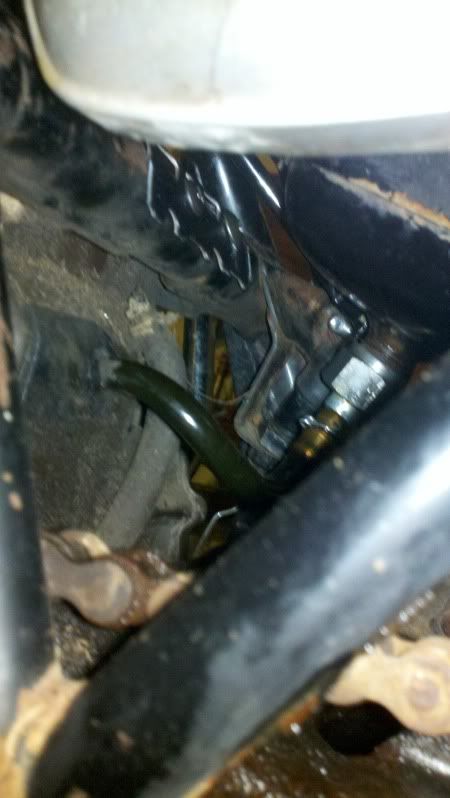 |
|
|
|
Post by woahblackbetty on Jun 26, 2012 7:39:28 GMT -6
Here's a prime example of failed backyard engineering. Due to the disintegration of the stock carb insulator and my swapping carbs I rigged up a solution to attempt to mount the Mikuni onto the cylinder. That solution was some heavy walled vinyl tubing and a couple of hose clamps. The tubing fit well onto both the carb and the intake spigot at first but then due to heating it became less of a viable option as you can see: The tubing in question, left end attached to the intake, right to the carb 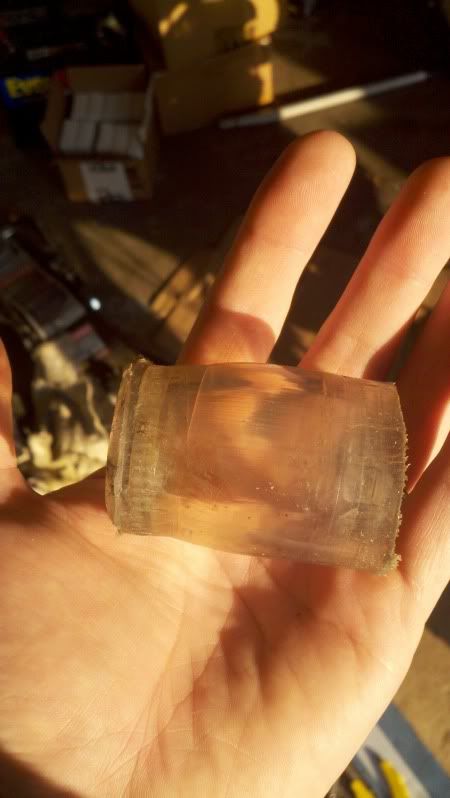 Looking at the end that attached to the intake  Close up view. See that step in it? That's from the heating of the cylinder and the clamping action of the hose clamp. 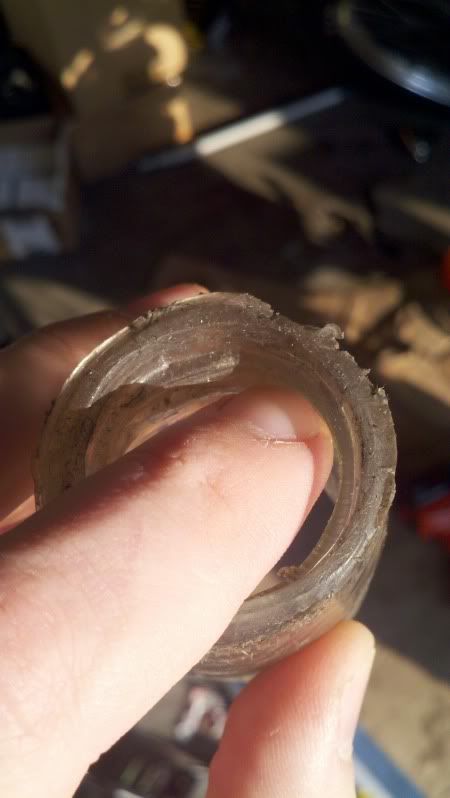 Now, I know that would work in a pinch if I needed it to get me home and it's all I had but it's not going to work as a long-term solution. Live and learn! |
|
|
|
Post by brad on Jun 26, 2012 9:01:42 GMT -6
Sure would be concerned about running lean. Good catch
|
|
|
|
Post by woahblackbetty on Jun 29, 2012 18:37:50 GMT -6
Got my parts in today... Now I'm banging my head against tuning this stupid carb...  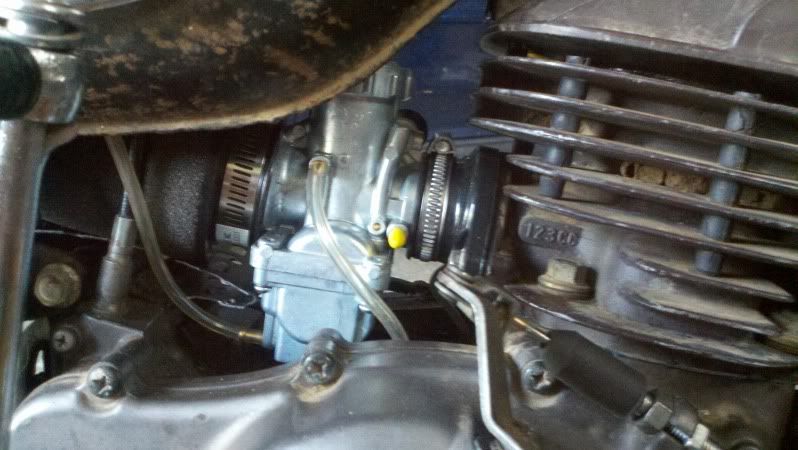 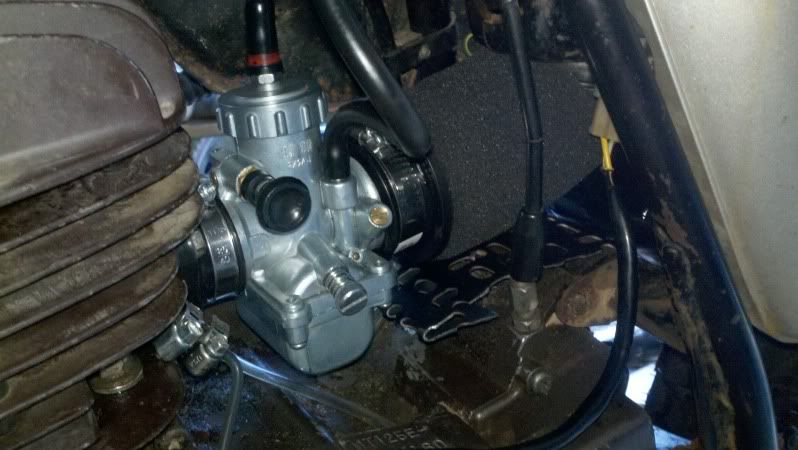 The pilot that came in the carb is too lean. It runs best with that jet installed and the air screw all the way in. That jet is un-marked but I believe it's a Mikuni 22.5 as that was the stock pilot jet size for the '78-'79 Yamaha DT125 which this carb was supposedly set up for. The next size up that I have is a Mikuni 27 and it's way too rich. The bike will fire up and idle with the 22.5 pilot in and the air screw cranked in but there's no mid/top power at all under load so I assume the needle and main jets are still too rich. The needle jet/main jet holder won't accept a stock Mikuni main hex jet. The threads are just slightly different (metric vs SAE?)  So much for getting to ride tonight!  |
|
|
|
Post by kb850 on Jun 29, 2012 19:06:42 GMT -6
I may be able to help u bud, I got a carb that's running too rich, its a mikuni too
|
|
|
|
Post by woahblackbetty on Jun 29, 2012 19:12:46 GMT -6
I may be able to help u bud, I got a carb that's running too rich, its a mikuni too From what I've found online I'm running a copy of a Mikuni VM26. I need a #25 pilot and either a #170 or #180 main jet. The stock jetting for this carb was #22.5 pilot & #190 main. As I said though, the Mikuni main jets don't thread into the jet holder. Interestingly though the one from my old Keihin will thread in but the mix is still too rich running that jet. |
|
|
|
Post by woahblackbetty on Jun 30, 2012 12:04:42 GMT -6
I just gave the cylinder and head a close inspection with the bike idling. Looks like there's a slight leak at the front of the head/cylinder mating surface. Off to Lowes I go for some .025" copper sheet and then O'Reilly for a can of Spray-A-Gasket... I'll get there eventually I'm sure! LOL ;D
|
|
|
|
Post by woahblackbetty on Jun 30, 2012 15:19:37 GMT -6
Here's what I found when I popped the head... Definite blow-out 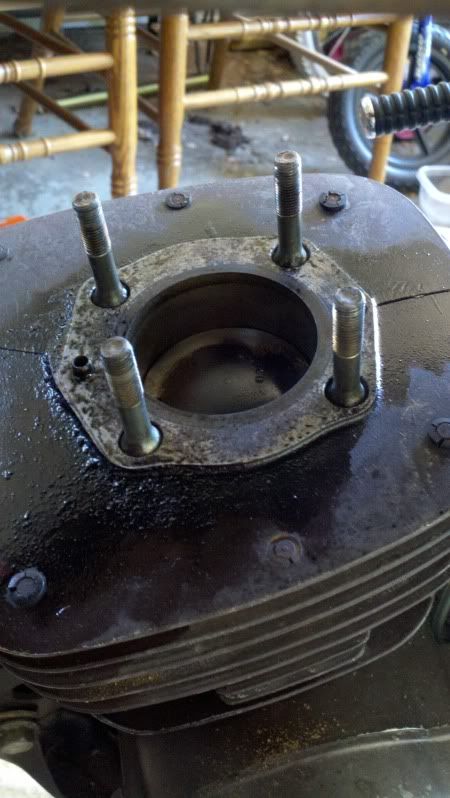 Copper sheet from Lowes  Copper gasket spray 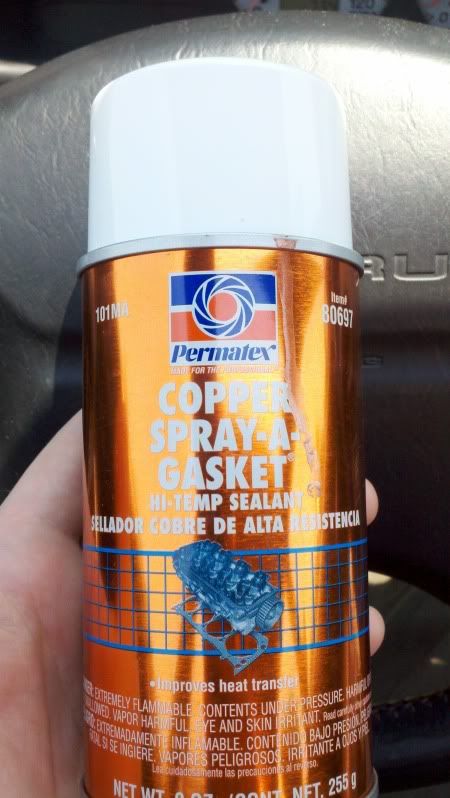 In process:  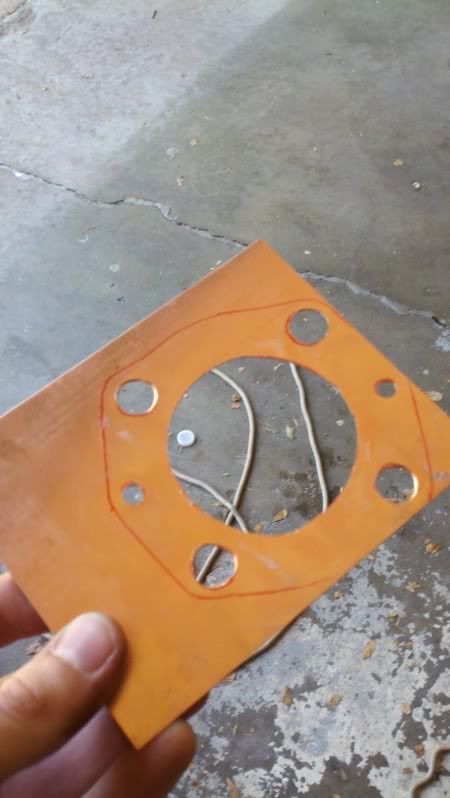 Finished product 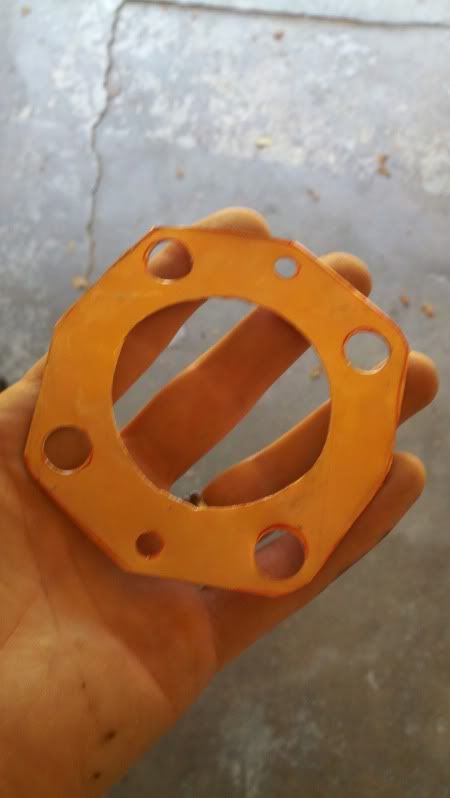 The stock MT125 gasket is .050" thick. The CR125 gasket fits also and it's .020" thick. The sheet I got from Lowes is .025" thick so it should work out just fine! |
|
|
|
Post by woahblackbetty on Jun 30, 2012 18:04:21 GMT -6
Today constitutes a success! While I was waiting for the copper spray to set up on the HG I popped the exhaust sealing ring off, wrapped some copper wire around the pipe to force a tighter seal, then popped the pipe back on. It took a bit of light tapping with the hammer to get it to fit in properly and then I took it up the street a couple of houses to see if the HG and exhaust seal helped. No appreciable difference so I pulled back into the garage to think things over. On a whim I pulled the cleanout plate from the spark arrester: 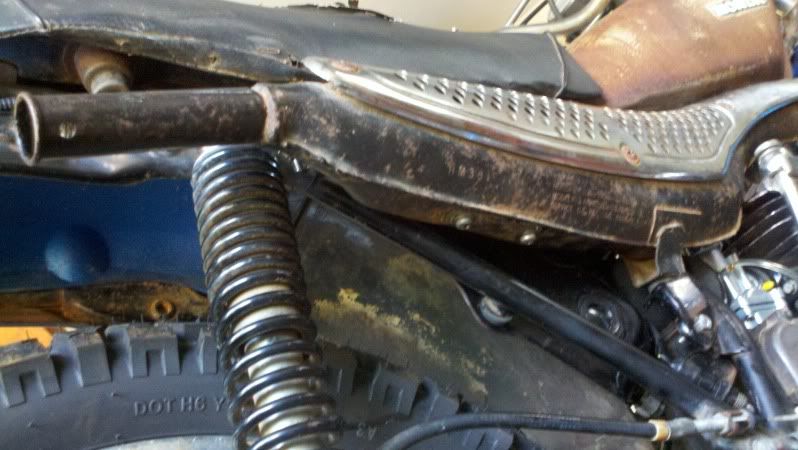 Then took it for a run up the street... HOLY COW what a difference!! She ran like a scalded ape. Having discovered that I took a coat hanger and ran that up the tail pipe to knock crud loose, then I ran it up through the cleanout port and knocked more stuff loose. Did that a few times and then the cleaning proceedure listed in the manual "open cleanout, block tail pipe with a rag, rev engine several times to blow carbon out of spark arrester" Put everything back together, grabbed my helmet and hit the neighborhood. I put in a 5 mile jaunt. Due to gearing it's a stretch to get her over 45-50mph but for running around town it'll be great. Definitely a blast to ride, very agile & maneuverable, noisy, rusty, smelly, and in a word "BEAUTIFUL"I'll be back later... I'm going riding ;D ;D |
|
|
|
Post by Tim-WT on Jun 30, 2012 18:24:10 GMT -6
WoooooHoooooooo!
'em 2t's love to hit the pipe!
Hope you can make it to Sunday Coffee tomorrow.
|
|
|
|
Post by woahblackbetty on Jun 30, 2012 20:57:30 GMT -6
WoooooHoooooooo! 'em 2t's love to hit the pipe! Hope you can make it to Sunday Coffee tomorrow. If she makes the run to church and back tomorrow then I'll plan on being out for coffee at 1:00 ;D |
|
|
|
Post by woahblackbetty on Jul 3, 2012 20:32:20 GMT -6
Just got home from a 17 mile run around town. Walnut Lawn/Fort to downtown, back down Jefferson to Primrose, across to TGI Fridays, back across to Primrose and finishing back where I started. No issues at all other than needing to feather the throttle slightly at stops to keep it running.
|
|
|
|
Post by Tim-WT on Jul 3, 2012 20:38:19 GMT -6
Very nice! Slow and steady get's it done! But the ride and the grin makes it worth it!
|
|